Printmaking

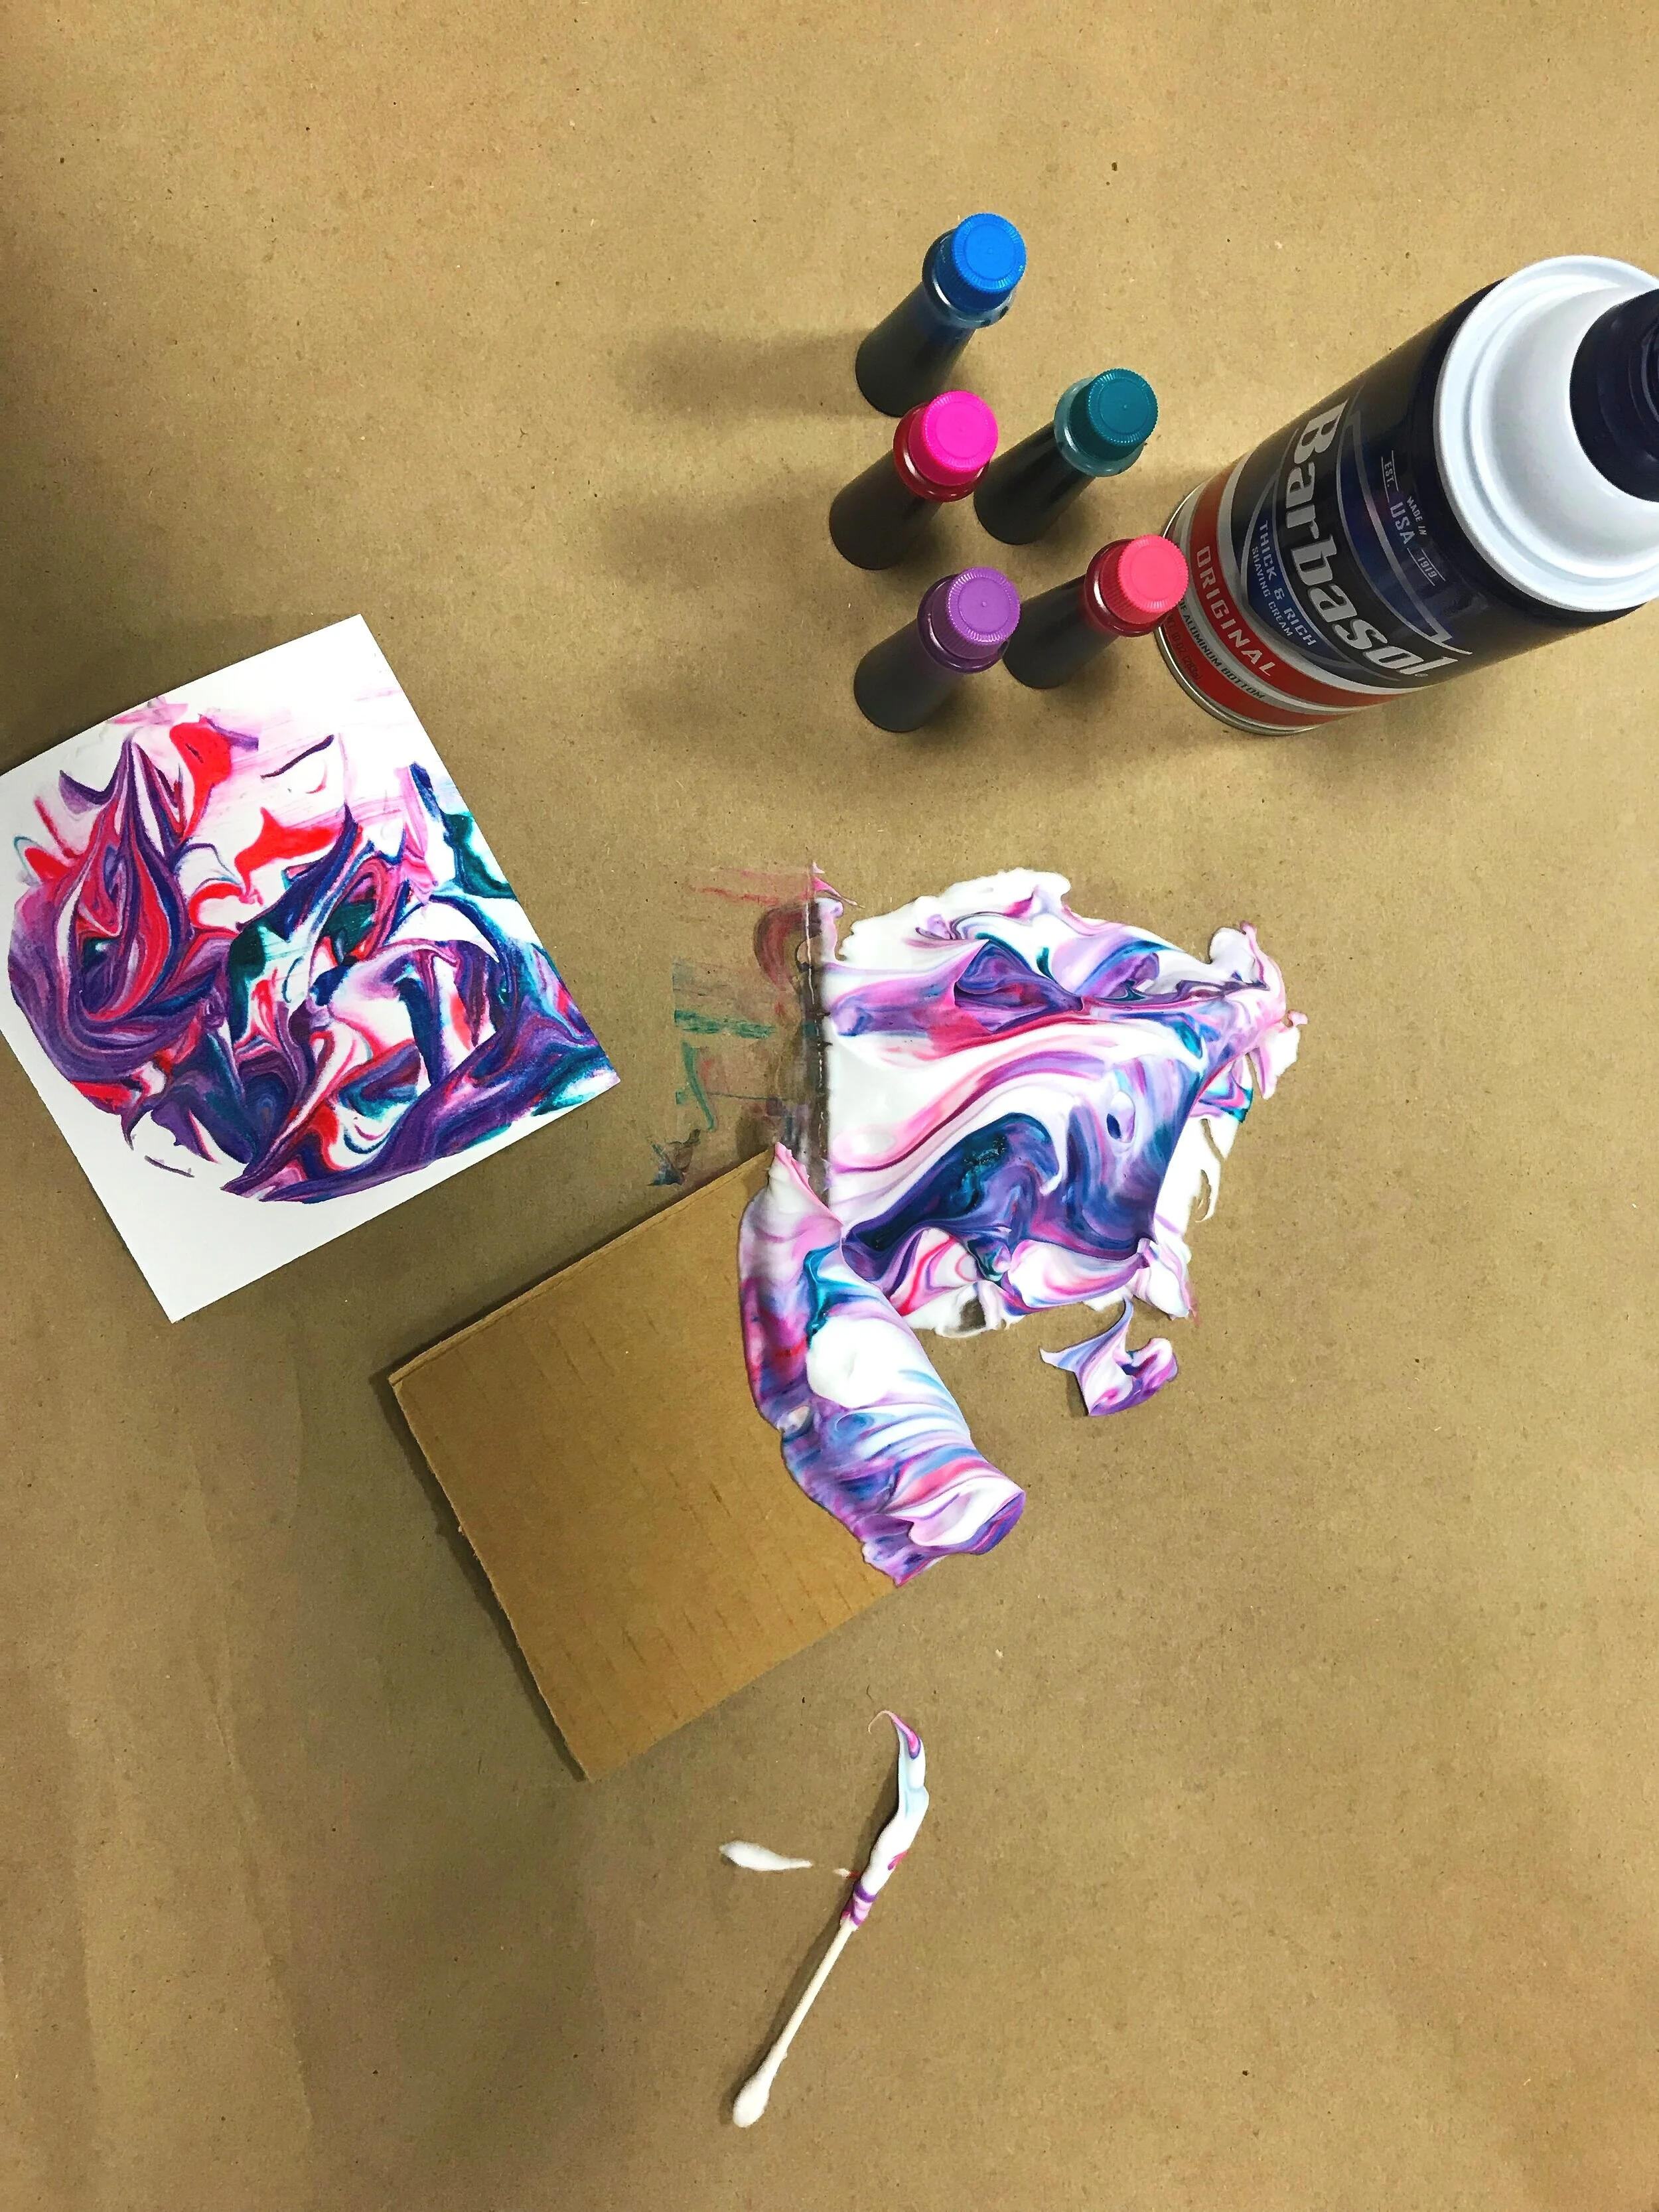
Shaving Cream Marbling
Price: Shaving Cream - $1.99 each / Available HERE
Price: Food Coloring - $4.39 for a pack of 4 / Available HERE
Age: 5+ years
HOW TO DO IT: First, apply shaving cream to a flat surface. It is best to put it on top of paper for easy clean up. I recommend applying the shaving cream flat and wide spread. This makes it easier rather than having a mound of shaving cream. After laying down the shaving cream, drop a couple drops of preferred choice of food coloring. Not a lot of drops are necessary. You will get a better marble-like effect with less color and more white space. Next, mix the colors into the shaving cream. I used a q-tip, however, you can use anything like a pencil or a toothpick. After the colors have been mixed around, lightly press your paper overtop the shaving cream, then scrape it off with a scraper (I used a piece of cardboard).
This is a super fun printmaking activity. I would recommend this style of printmaking to students in second grade and up. I think this activity can be done with any age, but younger students would need more hands-on help. After experimenting, I thought that using less food coloring might have better results. You can play with creating different textures and seeing how it prints onto paper. You can also add more shaving cream if you need more white space. After printing multiple prints, the color starts to fade away and get blurred as the colors mix together after every print. I found that you could add more food coloring as you go. The second round of food coloring pops out vividly against the muted background (see below, bottom left photo).


Bubble Printing
Price: 56oz Hand Soap - $3.97 each / Available HERE
Price: Food Coloring - $4.39 for a pack of 4 / Available HERE
Age: 5+ years
Bubble printing is another inexpensive, fun printmaking activity. This can be done with any kind of soap.
HOW TO DO IT: First, mix soap, water, and food coloring together into a container that will fit your paper. Second, use a straw to blow bubbles into the soapy mixture. Next, gently press the paper over the bubbles for the bubbles to pop on the paper. Be careful not to drop the paper into the mixture.
I recommend doing this activity with careful supervision. Younger students can accidentally ingest the soap mixture. It may also require more care for the students not to drop their papers into the mixture. I found it best to stir the soap and coloring before blowing the bubbles. It created more foam and creates a darker colored image.